Wednesday, September 14, 2011

no rest for the wicked

I've been super busy recently, having just moved into a (brilliant) new place.  Of course most of the rooms  need to be re-painted and that endeavor is already underway.

The sewing room is still all in pieces, my drafting table won't arrive until tomorrow, and most of my supplies are still languishing in boxes.  I can't wait 'til everything's all together and I can start working on things again!

I thought I'd leave you with this drawing which I started right before moving... it might turn into a painting.  We'll see.


Tuesday, August 23, 2011

A break (of sorts).

I got a decent start on the 1790s gown, but due to issues with my hands/wrists I laid aside all personal sewing projects about a week before the ball and since then have been solely restricting my sewing to work.  Hopefully my hands just need a good rest, and I can get back to my own sewing projects soon.  Lord knows there's a lot on my list!

In the meantime I've been busy finding a new place to live and all the hoop-la that surrounds leasing and moving etc.  In a few weeks I'll be happily ensconced in a lovely little Victorian house with two other girls, and will have a lot of fun re-painting and decorating.  There's a detached garage which I'll eventually turn into an art studio, and I'm really looking forward to setting it all up and working there.

Fortunately, my poor hands aren't half as bothered by drawing as they are by sewing, and I recently finished a charcoal portrait of my friend, Nicole.


Friday, July 22, 2011

Oh, 1797, you kill me with awesome

Next month I will be attending a Jane Austen ball and I must have a new gown for the occasion as it's held in a tavern from the 1790s, and I don't have anything from that period.

After looking at a LOT of fashion plates, I realized that most of the looks I particularly love were from the year 1797.  There's still a lot of crazy layering and some strange experimentation, but things have more or less settled into a stable "look".

I find I'm especially drawn to the style which features an overdress with a cross-over bodice and an asymmetrical skirt.  There were quite a few examples of this style that I ran across, and I've posted my favorites here.  Most of the extant examples of over-dresses from this period that I've seen are made of some sort of colored or pattern fabric with a white (often embroidered) gown or petticoat underneath.  However I was really interested by the 'Afternoon Dress' fashion plate from 1797 which shows a white overdress with a vivid blue petticoat peeking through the asymmetrical opening of the skirt.  Clearly not following the norm.

Evening Dress- Gallery of Fashion, Nov 1795

Afternoon Dresses- Gallery of Fashion, June 1797 

Concert Room Evening Dresses- Gallery of Fashion, April 1797 

The gown on the left of this plate is my absolute favorite of all the ones which I looked at.  I adore the drape of the skirts, the trim, the rich but subtle embroidery of the petticoat underneath... I even like the crazy helmet headdress!

Evening Dress- Gallery of Fashion, June 1797

I sort of mashed up all the elements that I really, really like and combined them in my quick little sketch below.  A gorgeous antique embroidered sari which I bought off ebay will become the petticoat and will also be used for the sleeves.  The over-all color scheme is creamy yellow and white with purple or midnight accents.  And of course there will be an epic headdress with large ostrich plumes dyed at the tips to match the trim on the gown...

Wednesday, July 20, 2011

My Portrait Miniature Experiment

A few days ago I sat down and finished the portrait miniature which I had started a couple months ago.  For being my first attempt I'm somewhat satisfied with it, and I feel like I learned a lot from this experiment.


Watercolor on rolled polymer clay, about 2" x 2.5"

I was mainly focused on trying to learn the technique and get used to the materials and scale of things.  With that in mind, I simply copied from an original in one of my library books:  English Portrait Miniatures.  Sadly, I had to return the book before finishing my miniature OR having the presence of mind to write down pertinent info concerning the artist and subject. 

There are definitely things I want to do differently for the next attempt, most of which relate to tools and materials.  For this first try, I simply used whatever I had on hand, but the student-grade watercolors made my job a lot more difficult.  The white especially... it seemed to 'puddle' on the surface far more than any other color and didn't blend half as well either.  Even if I don't buy any other new paint, I will certainly be investing in a good quality white before my next miniature.

Also on the top of my list are better brushes.  A lot of very small brushes don't have the good flow required for the paint to cling to such a nonabsorbent surface.  I noticed that the same tiny brush which left a good line on paper barely deposited any paint onto polymer clay.  I'm hoping that real squirrel hair brushes (which were used in the 18th cen for such a purpose) will improve things.


My final, and perhaps largest, concern is how to protect the surface.  Even when completely dry, one drop of water would lift the paint right up and and utterly ruin the miniature.  The clay slab is a bit too thick to put under glass with a frame (although that will probably be a possibility for the fake ivory I intend to try at some point soon), so I am trying to find a good spray varnish, intended for watercolor, which will seal the surface.  After all, it would be really pointless to have a miniature that you couldn't even risk taking outside!

Tuesday, July 19, 2011

A Regency Gaming Night

This past weekend was spent very pleasantly in Fredricksburg at Jenny-Rose's Regency era gaming night.  Although tables were set up for several different games I ended up only playing Speculation, and game which relies heavily on bidding and gambling for any true entertainment... something all of us who played it seemed far too lazy to engage in!

The company was delightful, the rooms prettily decorated, and good times were had by all!

Before the gaming commenced, we all milled around the back-yard taking pictures of each other.  I didn't get any of myself with my camera, but plenty of others did, and I have happily stolen the ones that I like best.

Courtesy of Gloria... I think...

I wore my old(ish) 1820 silk evening gown, though with new jewelry and a plume in my hair.

Courtesy of Nicole

Courtesy of Maggie

A selection of my pictures of the evening's company-


After the card playing had died down for the evening we just sat around chatting and snacking and drinking Good Things.  At one point, I pulled out my trusty drawing box, and did a quick sketch of Taylor as she sat across the table from me, lit by candlelight only.

Sunday, July 10, 2011

Sketches from UTR

If doing something twice constitutes the beginning of a habit, then I have effectively formed the habit of doing little sketches of friends and acquaintances at reenactments.

I had enormous amounts of fun with this at Under the Redcoat, and even though I'm shockingly late posting about it, I wanted to share my drawings from the event.  Like last time, they are all fairly small (so as to fit in my drawing box) and are roughly 5x7" each. 

Nicole
Nicole

Other-Sarah churning ice cream
Other-Sarah making ice cream

Sarah- 1st go 'round
Sarah
I like this little sketch, but utterly failed to capture her likeness.  This was highly irritating.  See below.

Sarah and Jenny
Sarah (again) and Jenny
As you can see, for a brief while I switched from charcoal to graphite pencil... I was incredibly frustrated by my lack of ability to capture Sarah's likeness when initially using charcoal.  The second drawing was even worse (really bad in fact, and I can assure you it will never be posted anywhere online!) so I gave the graphite a try.  On this third go, this time in graphite, it wasn't totally awful so I let it be.

I feel like an invisible challenge has been laid down though.  Sarah is such an animated and vivacious person that capturing her in a flat, still format felt somehow a little unnatural and far more difficult than I had anticipated.  I will have to try again when I next see her.  And maybe again and again...

Abby
Abby
Right before I was about to leave for the day, I saw Abby walking across Market Square, rushed up to speak with her, and she kindly agreed to sit for me.   As we sat there (she very still and I sketching quickly) a lot of people apparently came up to see what was going on.   This included the official CW photographer who even videoed us.  I was blithely unaware of most of our audience however... I hadn't even realized how much I block out my surroundings when I'm drawing!  If there'd been an attack, I'd probably have died first.

Conclusion- I'll definitely be doing this drawing schtick again at my next reenactment.  I love being able to engage peoples' interest in a slightly different way than normal, and I'd really like to start building up an impression around the idea of a traveling portraitist.  Lots of very vague ideas at the moment, but it could certainly become something.

Saturday, July 2, 2011

quarter back gown for UTR

Since I live in Williamsburg, it was kind of an imperative that I attend Under the Redcoat this year.  Not that I objected... I'd never really been to UTR before, and was really happy to be able to experience the event and see many wonderful friends and new acquaintances in the process!

And of course, I needed a new gown.


I used a medium weight linen from Burnley and Trowbridge that had small lavender, white and black stripes and lined the bodice and sleeves with a light-weight white linen.  My friend Nicole draped the pattern for the bodice and sleeves on me, and I cut everything out about a week before the event.  If I didn't work full-time, this would have been a perfectly fine time-frame in which to sew a gown, but as it was I nearly keeled over and died trying to get it done on time.  Even so, Nicole ended up almost entirely making my petticoat for me so that I could actually get a few hours of sleep the night before I was supposed to wear it.


The innards of the gown are pretty typical-


The seams of the back pieces are constructed with the "weird running whip stitch thingy" which is seen in a fair number of extant garments, and which Abby (Stay-ing Alive) thoroughly describes in a very helpful post.  As I tried it out, I fell utterly in love with this method of construction.  It's fast, easy, strong, and looks really neat and clean.  And, as you can see from the photo below, it looks totally normal on the outside.


I still want to add cuffs and trim to the sleeves, but I was pretty satisfied with how it all turned out.  It was fairly cool and comfortable to wear and I do kind of adore the fabric!

UTR itself was also highly satisfying, and I was able to take my little drawing box with me and do some sketches of people... but I'll save that for another post.

Friday, June 3, 2011

Greenfield Village Remembrance Day


I recently got back from a trip back to Michigan for my favorite Civil War event, Remembrance Day at Greenfield Village. It was really refreshing to see my family and good friends and spend some quality time away from the 18th century.

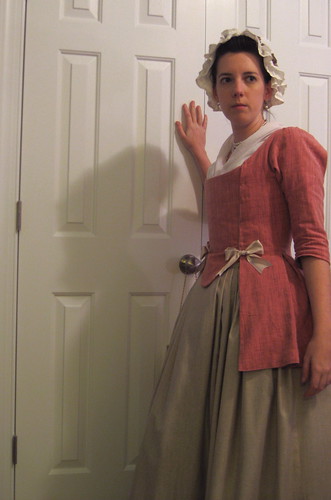
Due to utter sewing burn-out, I didn't make anything new for the event and the only preparation I did was to swap out the buttons on my wool asymmetrical dress.  I would have liked to have a new ballgown and a sheer dress and a complete male civilian outfit  (I have indulged in many fond daydreams of dressing as a boy and running around wonderfully free), but I suppose I didn't want any of it enough to actually pull out fabric and start sewing.

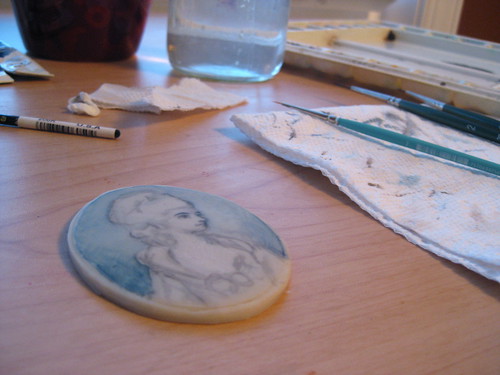
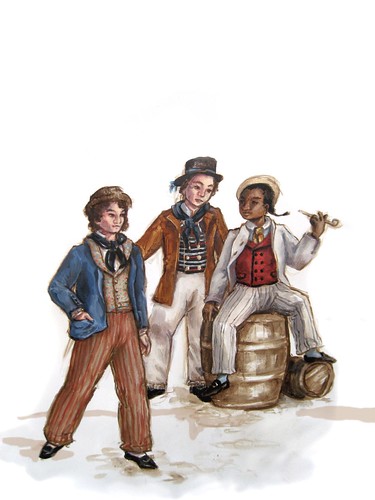
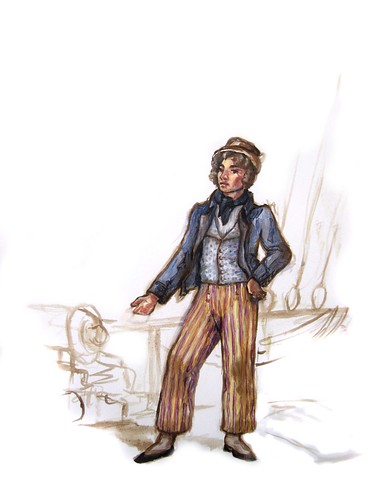
I did do something new this year though, and took some drawing supplies along with me to sketch at the event.

my reenacting drawing box

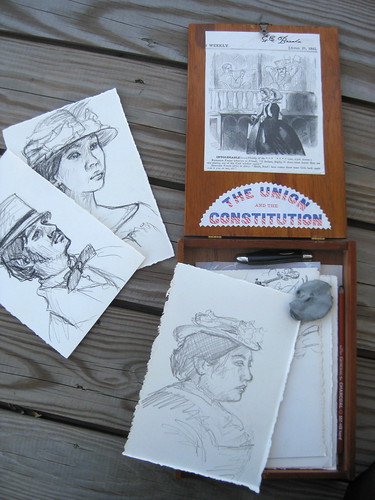
This little wooden box was a gift from a friend a few years ago, and it was the perfect size to kit out as a period-ish drawing set.  Inside I have a thin sketchbook/notebook, loose pieces of paper, graphite and charcoal pencils, a rubber eraser, and a pocketknife for sharpening the pencils.  On the outside the box is about 6"x 8" and is about 1.25" deep... the inner dimensions loose nearly .5" off those measurements.  I can just about fit in all the essentials, while it's still small enough to easily carry around or sit in my lap.

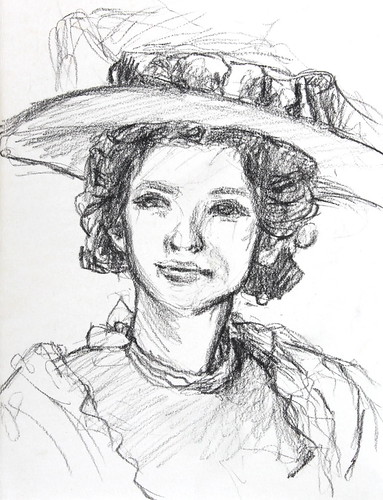
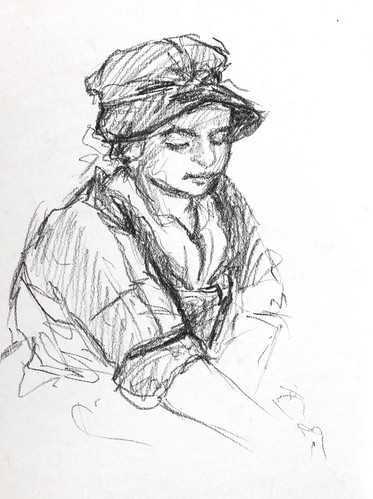
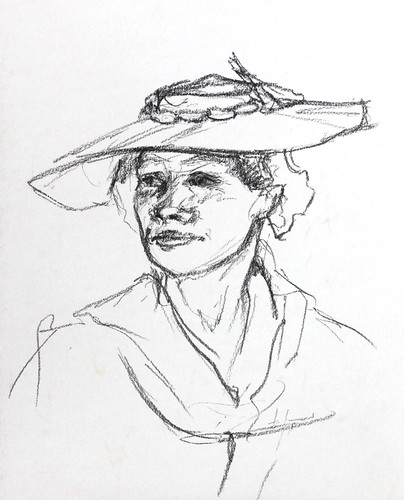
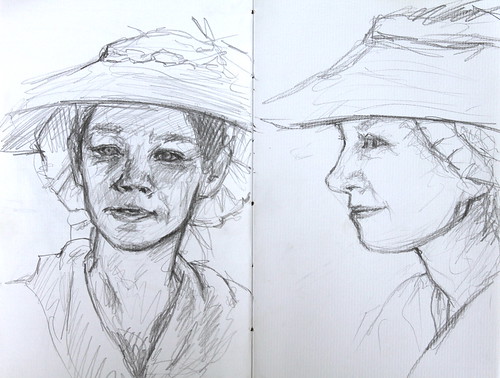
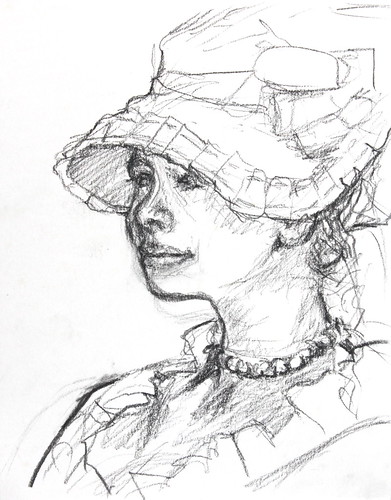
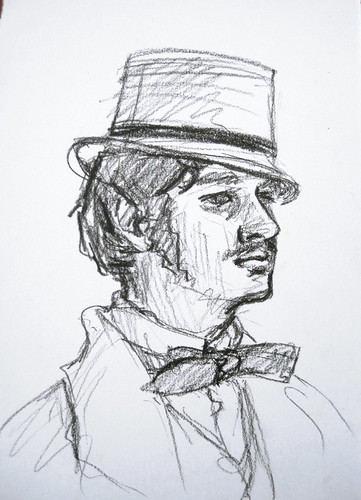
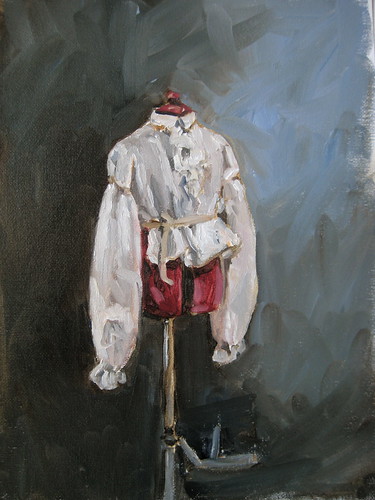
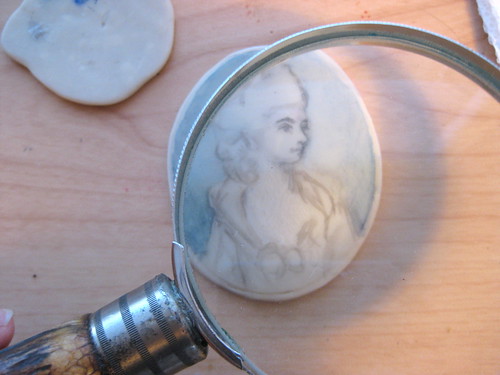
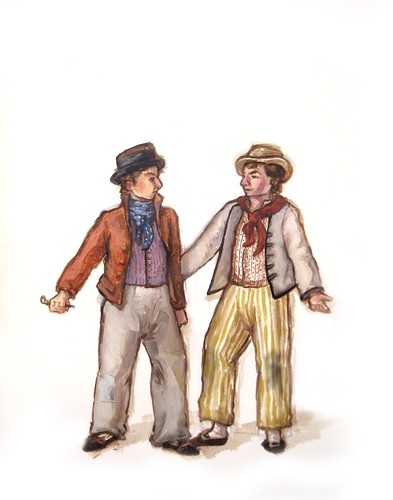
The sketches are naturally rather small, and were done rather quickly in about 5-10 minutes each.

Katie

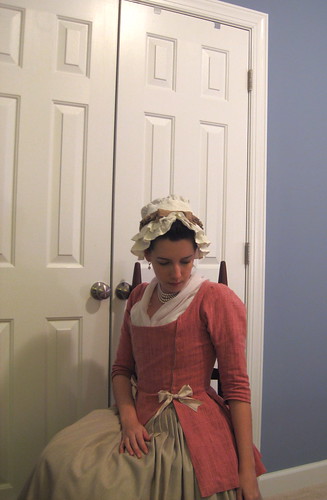
Passersby seemed rather intrigued by the sight of whomever I was drawing sitting so still-ly in our camp, and a fair number came up to investigate.  There would be a few moments of awkward conversation as they tried to talk to my subject, who would reply without moving more than their mouth, (my friends make very good artist models... at least for short periods of time.  I have yet to test them with longer sittings.) before they noticed me sitting close by and saw what I was doing.  You could see the moment everything suddenly made sense to them, and I often heard, "Oh, you're drawing" in tones of happy surprise.

Mike

Samantha

Unfortunately, I was not brave enough to venture out to draw people who were not part of my camp, but I suppose I'll have to address that deficiency next time.  Doing impersonal gestures is one thing, but as I am particularly fond of doing portraits, shyness is a luxury I can't really afford to indulge in.

Friday, May 20, 2011

Steampunk Wings and Still Stuff

I really want to see more 1860s inspired steampunk impressions... there's a world of amazing stuff out there from the bustle-era onwards, but it seems as though the steamy age of the 50s and 60s is quite overlooked.

steampunk wings
Oil on Masonite, 18"x24"

Also, apologies for falling behind a bit on the internet!  Even though I drew the initial sketch for this painting last summer, I didn't get around to actually painting it until about four weeks ago.  It was really great to be properly painting again... I hadn't realized how much I'd missed it.

In the spirit of getting back into the practice of regularly painting, I did a couple small still lives recently as well.  It had been several years since I'd painted from life, and even longer since I'd done a still life of any kind.  What I'd managed to forget, however, is how incredibly boring I find still lives to be.  There must be some sort of magical method or prop that would make the practice interesting, but as it stands, I find this sort of thing incredibly dull.  Good practice, but so tedious.  Both are oil on canvas paper, 9"x12".

Habit Shirt

muskrat skull still life

I have a final sketch and prepped board ready for the next painting, and I'm really rather excited about it.  There'll actually be a real background and environment for once!

And next weekend I'll be travelling up to Michigan for my favorite Civil War event, so hopefully there'll be good pictures and interesting tales to relate after that.  I'll be taking a sketchbook along with me too... I've never sat and sketched people at a reenactment before, but I think it could be a lot of fun! (also, I really don't feel like doing handwork or knitting these days, yet I don't want to be completely filled with sloth and idleness)  ;)

Monday, May 9, 2011

Miniatures: putting the brush to... clay


So.  Right.  Miniatures.

The research was easier than I thought it would be; mainly thanks to my access to the Rockefeller Library here at CW, which contains nearly every book published that pertains in any useful way to the eighteenth century.  The technical process on the other hand... well, that's a whole other kettle of fish.

I recently found a link to a vendor than sells all sort of materials for miniature painting, including several ivory substitutes.  While I fully intend to order and try a variety of these, I wanted to get painting (and practicing) at once and decided to experiment with polymer clay.


I rolled out the clay as smoothly as possible, and trimmed it to match the little frame that I have.  Since I wasn't sure which color would simulate ivory the most after baking, I made three different samples in: Ivory (natch), Winter Cream, and Translucent.  Oddly enough, Translucent came out a sort of clear, fleshy tone... way too pinky to be used for this sort of thing.  Winter Cream was a good color, but a bit too chalky in appearance.  Happily, the Ivory actually did look the most like ivory, and I set out to paint.

I started on a little shmushed piece that I'd baked as well, just to get a feel for the watercolor on this sort of surface.  Watercolor is persnickety at the best of times, but when you are applying it to a nearly totally non-absorbent surface it turns somewhat evil.  The most terrifying part which I found, is that even when the paint was dry, if you dripped water on it or added a wet wash, it lifted right back off again... just like it does on a palette.

This really hammered home to me why miniature painters nearly all employed a sort of stippled technique, as it is the least disturbing to paint already laid down.

For the very first miniature, I decided to simply copy an original, as I'm not attempting to do anything other than get a handle on the medium.  So far I've merely done a light outline and started to lay in the background.  We'll see how it progresses...

Tuesday, April 19, 2011

Just a fly-by

I've been quite busy recently, and have spent the last week or two since my last post up to my ears in painting/researching/planning my future.

First miniature is underway, and I promise I'll post about that soon.  I've discovered that, perhaps due to the small scale (to which I'm still adjusting), I can only work on it during daylight hours.  If I want to work on it after dusk I'll need to finally buy a decent flexible lamp.  Since the bulk of my days are taken up with my regular 8-5 job, I don't have a lot of daylight once I've gotten home and eaten dinner and regained a bit of energy.  As this means I can't really work on the miniature during the week, I also started a new oil painting.  It's kind of steampunkish, and I'm really hoping it turns out half as good as it looks in my imagination.

Getting back into "serious" painting fits into the whole "planning my future" bit I mentioned in my first sentence.  I have lots of ideas for new pieces, and lots of ambitions regarding heading towards an eventual art career.  However, nothing will ever happen until I put together decent, and coherent, body of work.  That is my goal for the summer.  Also been reading lots about art fairs and visiting local galleries etc.  It's all rather frightening, but not, I think, unachievable.

And totally unrelated to anything else, just check out John Singer Sargent's studio!


I can only imagine working in a space like that... but I suppose sheer genius deserves the best.

Friday, April 8, 2011

Tackling the portrait miniature

Queen Charlotte by Jeremiah Meyer- 1772

It kind of goes without saying that miniatures are not only way cool but extremely prevalent in the 18th century, in the latter half of which they truly enjoyed their heyday.  The problem is, no one does them nowadays.  (actually, if anyone knows of anyone in the world who paints 18th cen style miniatures, I'd love to see their work)

Painting miniatures was one of those few occupations considered genteel enough for a lady, and while a large number of professionals had a thriving business painting miniatures it was also a hobby often picked up by amateurs.  In 1712, a writer for The Spectator noted, "limning, one would think is no expensive Diversion, but... she paints fans for all her female acquaintance and draws all her relations pictures in miniature".  While Europe seems to have been more accepting of female artists in a professional capacity than America was during the 18th century, there are certainly references to ladies learning painting and drawing here during that time.  By the early 19th century a few women were working as miniature painters, and the number of female artists rapidly increased as time went on.

All of this fits perfectly with my long-standing desire to combine fine art and reenacting in an appropriate and enjoyable manner.

-First step:  Look at LOOOOTTTSSSSS of miniatures

-Second step:  Read primary documents concerning The Art of Drawing and Painting in Water-Colours, and Miniatura or the Art of Limning, etc.

-Third step:  Research tools and materials.  Try not to get too bogged down in the thrill of Artists Pigments c. 1660-1835. (No, seriously... this book is epicly awesome.  I could, and may yet, write a very long blog post on just a few snippets of info found within its pages.)

-Fourth step:  Read more about the history of portrait miniatures, or, as they were more commonly known before the mid to late 18th cen, 'limnings'.

-Last step:  Hold my breath, cross my fingers, and just paint.

(will post more later about materials, techniques, and my progress)

Sunday, April 3, 2011

New clothes! 18th Cen. Jacket in Pink

I shall preface this post with the disclaimer that the jacket is Not-Done-Yet and is still in want of trim.  That said, I've worn it twice now to two different gatherings, and wanted to document its existence.


The jacket is made of a pink cotton homespun, lined with a natural medium-weight linen.  This was one of those situations where I had both fabrics in my stash and really didn't want to spend extra money... Also, I'm trying very hard to move away from blue in my costuming, as about 2/3's of my historical wardrobe is in the blue family.  Not sure how successful I'll be in the long run, as I still adore blue (and it never fails to look good on me).

Like the majority of my historical clothes, the interior seams are all done by machine, but everything visible is hand-work.


The fullness of the skirts is achieved with five inverted box pleats, one at each seam, which are whipped to the lining for stability.

The pattern is very loosely based off the robe à l'anglaise in Jean Hunnisett's book.  I say "very loosely" as I looked at it for general sizing, and drew what I thought would work.  Fortunately, it did.  I didn't bother drafting a sleeve pattern though, and just adapted one of Nicole's personal sleeve bases.

I'll probably write more about research and general info once I really truly finish it, and can post pictures of it in all its trimmed glory.

Tuesday, March 29, 2011

Paintings of the lower sort- still in 1795!

Unless I decide to add backgrounds, the paintings are done. 

I worked quite a bit smaller than normal on these, using paper about 12x20 inches large for each piece, with the figures being approximately 6-9 inches tall.  That's about the size I normally like to paint faces.

One of the things that had impressed me about the original 1795 ad was how colorful so many of the garments described were.  I tried to get that same feeling of color in the paintings without it turning into a circus (though that would have been fun... late 18th cen circus... hmmm).  After all, how often do you ever run across yellow, purple, and white striped trousers?

clothes of the common man- 1795


clothes of the common man- 1795

clothes of the common man- 1795

These were all painted on rag paper primed with gesso, and, as per my usual, are done with oil paints.