Showing posts with label 18th cen. Show all posts

Sunday, June 22, 2014

Life in Scotland: Outlander

I sometimes think that no matter where I go and what I do, I will never escape the 18th century.  This time though, it has become a part of my life in a very different way than before.  Since the begining of my summer break, I've been working as a Costume Trainee on the Starz production of Outlander which is filming here in Scotland.  This is my first experience working on a TV show, and I've learned quite a lot in the last couple months!

 (Official production still of the two main characters: Claire and Jaime)

The series premiers on the 9th of August in the US, and if historical drama and fighting and romance is your thing you should definitely give it a watch!  Apparently the book series it's based on has quite loyal followers, but not having read the books myself I can't tell you much on that score. ;)

Check out the trailer below and see what you think!  Even if I wasn't working on it, it's the sort of show I'd probably be really into.


Saturday, May 18, 2013

Stitching the First Oval Office

This summer will be rather different from any other which I've experienced, and I'm really excited about what I'll be doing!

I'll still be sewing for my paycheck, that part hasn't changed; but I'll be wearing costumes instead of making them, and am part of a team making a massive, linen, 18th century reproduction tent.  Which tent?  None other than George Washington's Sleeping Marquee.

The project is through the partnership of Colonial Williamsburg and the nascent Museum of the American Revolution (which owns the original tent that we're reproducing).  Fabric has been specially woven, all wooden poles and stakes are being made by the joiners and wheelwrights at Williamsburg, and for fourteen weeks this summer a group of us will be constructing the tent itself.  It's really rather wonderful having the chance to work on such a unique project, and to be on the interpreter side of things instead of always behind the scenes.

Today was our first official day, and it promises to be a very interesting summer!

 The team busily stitching pieces of the inner tent.  That's me on the far left, and for once I'm not wearing anything which I made!

The whole project is being very well documented, and if you're at all interested you can like the facebook page which has a lot of great info about the project, check out the blog, or even watch us live on one of the Colonial Williamsburg webcams(yeah, you can watch me throughout each entire work day... which isn't stalkerish at all.)

Sunday, January 6, 2013

This time on ivory

While I'm catching up a little on projects I finished a while ago, I thought I should probably post about a portrait miniature which I painted last spring.  Aubry, a truly lovely historical costumer, had contacted me about doing a miniature of her husband in late 18th century style and clothing.  This gave me the opportunity to paint a miniature on actual ivory, something I'd not before attempted.

Painting on ivory was definitely an... experience.  As much as I thought polymer clay wasn't absorbant, ivory was even less so.  Very, very slick.  After a bit of trial and error, I found that the best way to apply the paint was in very tiny, little brush-strokes.  A sort of stippling in tiny lines instead of dots, if that makes sense.


I can totally see how one would need all the years of an apprenticeship to be able to call one's self a miniaturist!  The skill is definitely one that requires practice.

Thursday, December 13, 2012

This is my normal

Obviously, my recent creative pursuits have been somewhat taken over by Steampunk, and it's provided a refreshing contrast to the vast majority of what I constantly sew and make (which has not before appeared on my blog).

As many of you probably know, I work at the Costume Design Center of Colonial Williamsburg.  I was a stitcher for about a year and a half before becoming the first hand approximately six months ago.  (I say "the" first hand instead of "a" first hand since I'm the only one... in the shop there are two cutter/drapers, myself as the first hand, and about twelve stitchers)

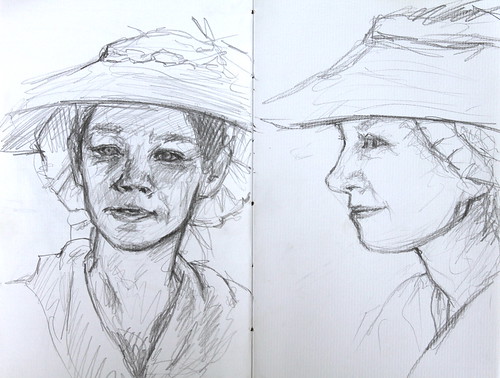
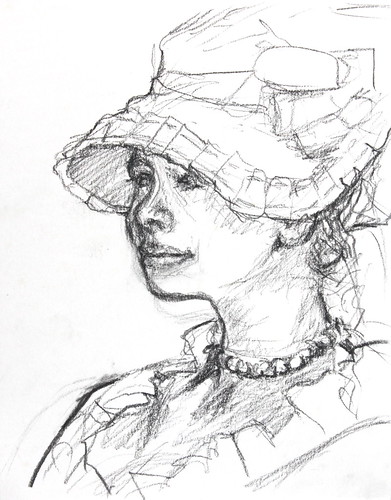
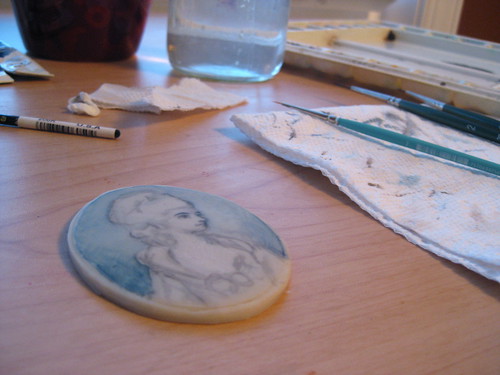
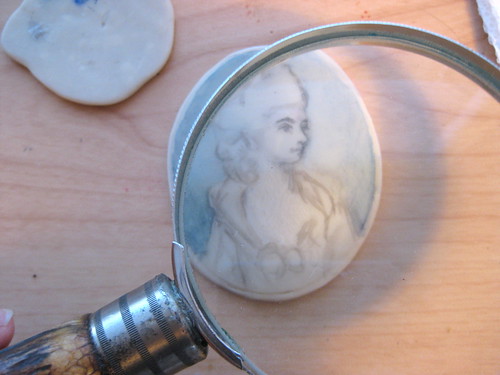
For eight hours each day I fit, alter, cut, make, and repair countless pieces of clothing for the historical interpreters and actors at CW.  Lately I've been working a lot with our designer on a couple special projects, including some experimenting with 18th century techniques for painting silk (that's been loads of fun so far).

Naturally, the vast majority of what I work on is 18th century clothing, though due to the 150th anniversary of the Civil War there are now several programs set in that time period for which I've made mid-19th century clothing, plus some 17th century pieces for programs at Jamestown.

I can't even begin to tell you how many full allotments of clothing I've worked on.  Hundreds.  Too many to possibly remember.

Men's civilian coats.  Regimental coats.  Waistcoats.  Breeches.  Shirts.  Shifts.  Petticoats.  Plain gowns.  Gowns with ridiculous amounts of trim.  Caraco jackets.  Bedgowns.  Short jackets.  Jackets from Patterns of Fashion and Diderot.  Aprons.  Cravats.  Kerchiefs.  Caps.  Haversacks.  Trousers.  Gaitor trousers.  Spatterdashes.  Riding Habits.  Cloaks.  Greatcoats.

And that's just the ordinary, 1770s stuff... special programs and the theatrical plays often branch out into other time periods or sometimes simply get a little bit crazy.

Here's a small sampling of things I've made at work... obviously this doesn't cover the whole scope of what I do, and have done, there, but it should give you a general idea.  All designs, materials, etc belong to Colonial Williamsburg Foundation.

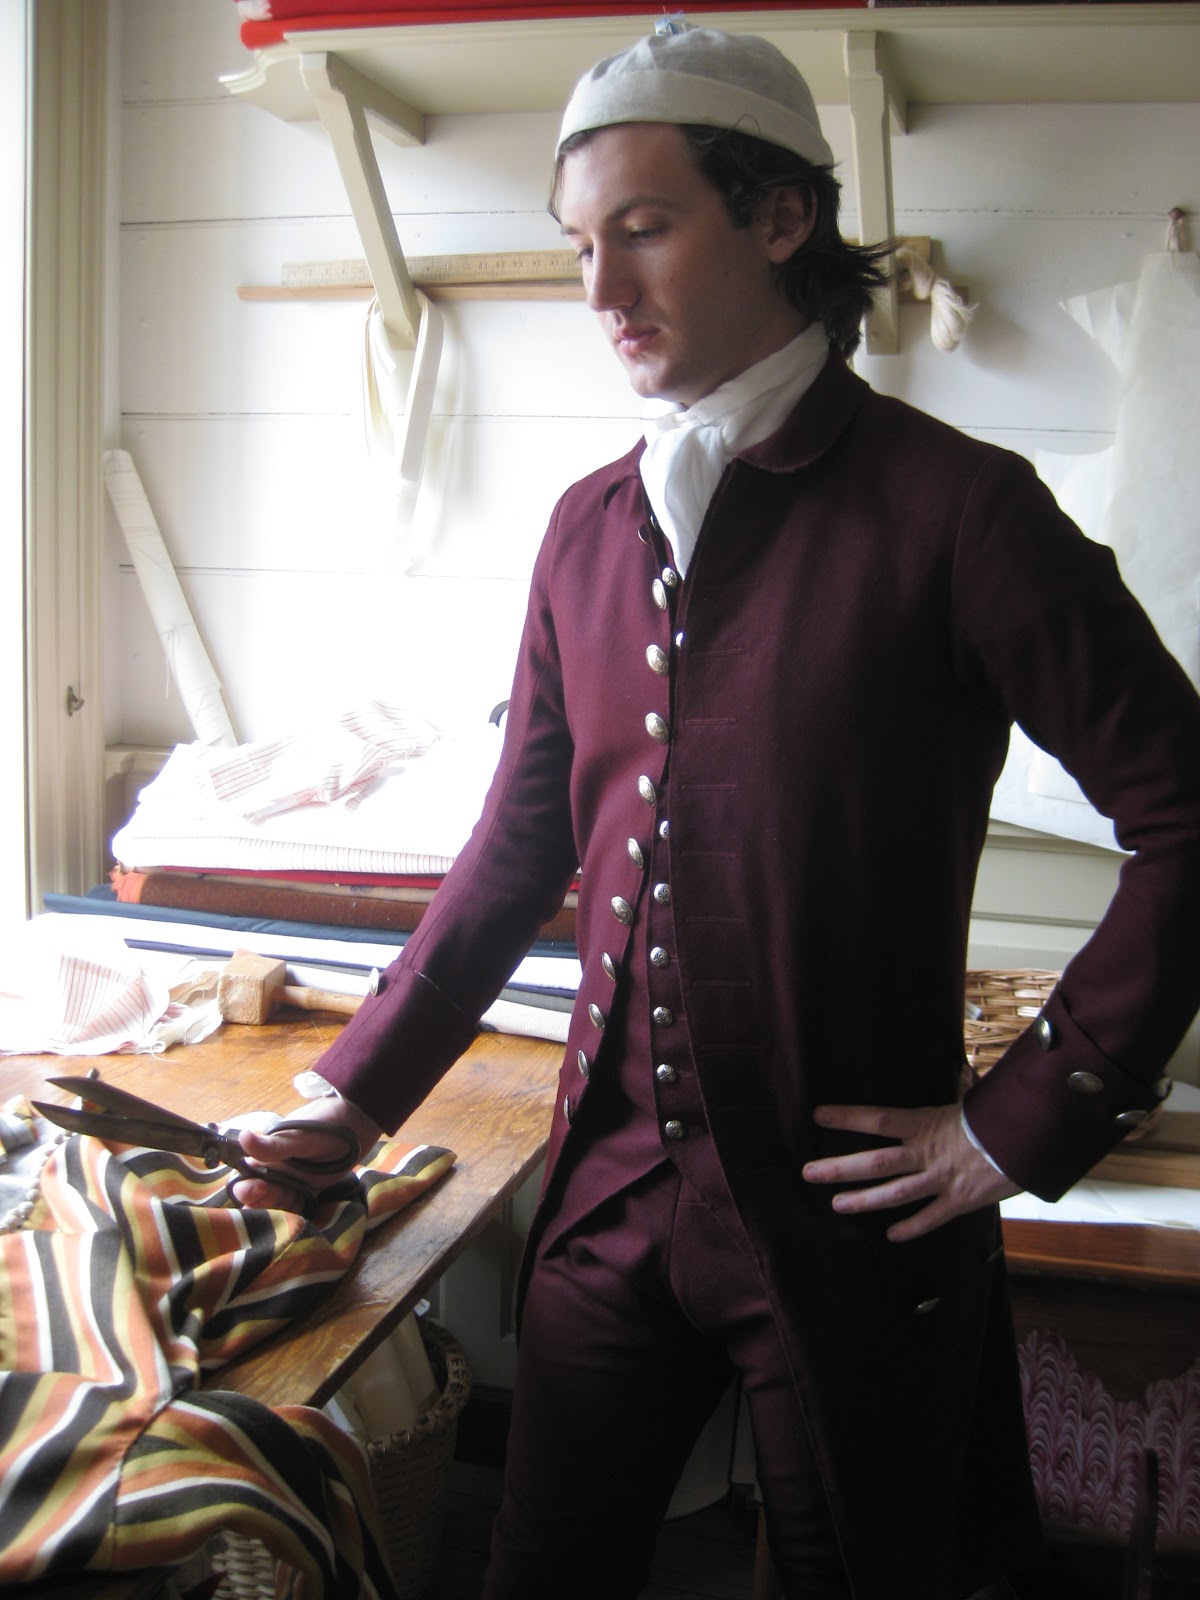
Wool coat and small clothes, cut edge with hand finishing and buttonholes.  Worn by Tailor's Apprentice Michael McCarty.

Continental Army Officer: Regimental Coat.  Worn for the portrayal of The Marquis de Lafayette. Photo by Jurgen Vösych.

1860s Dress for the Women of the Civil War Tours.

Corded Mid-19th Century Corset.
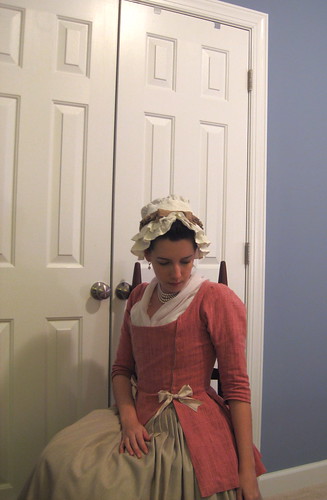
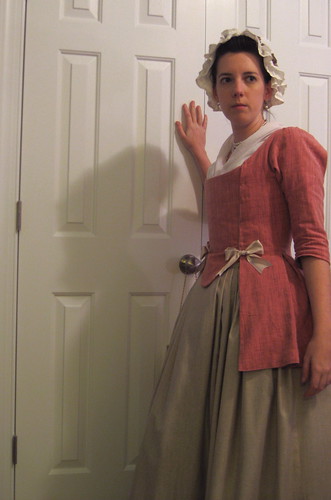
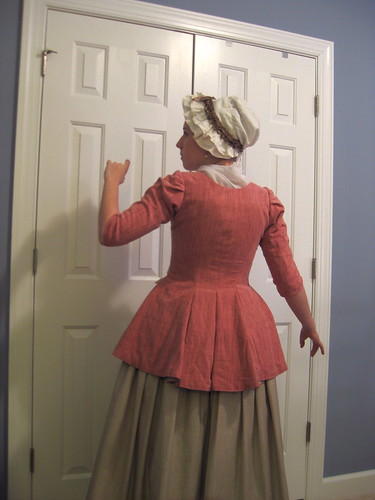
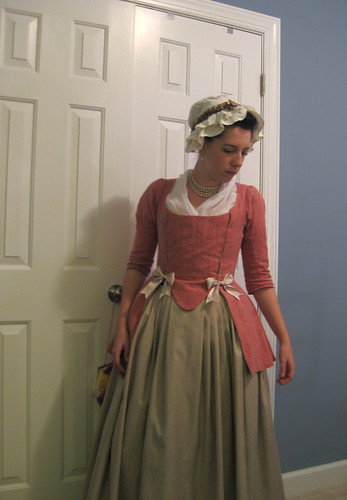
1770s Stays.

  
Fife and Drum Regimental Coat.  Incidentally, this is the first full garment I made working at CW.

So there you have it.  A little taste of what I'm up to all those hours I'm not working on my own projects and ideas.  Being surrounded by the 18th century all day every day has certainly changed my attitude in regards to my own work... I think it has a great deal to do with why I've become so inspired lately by Steampunk.  Historical clothing has become my normal, and like the Amazon commercial says, "normal just begs to be messed with".

Wednesday, July 20, 2011

My Portrait Miniature Experiment

A few days ago I sat down and finished the portrait miniature which I had started a couple months ago.  For being my first attempt I'm somewhat satisfied with it, and I feel like I learned a lot from this experiment.


Watercolor on rolled polymer clay, about 2" x 2.5"

I was mainly focused on trying to learn the technique and get used to the materials and scale of things.  With that in mind, I simply copied from an original in one of my library books:  English Portrait Miniatures.  Sadly, I had to return the book before finishing my miniature OR having the presence of mind to write down pertinent info concerning the artist and subject. 

There are definitely things I want to do differently for the next attempt, most of which relate to tools and materials.  For this first try, I simply used whatever I had on hand, but the student-grade watercolors made my job a lot more difficult.  The white especially... it seemed to 'puddle' on the surface far more than any other color and didn't blend half as well either.  Even if I don't buy any other new paint, I will certainly be investing in a good quality white before my next miniature.

Also on the top of my list are better brushes.  A lot of very small brushes don't have the good flow required for the paint to cling to such a nonabsorbent surface.  I noticed that the same tiny brush which left a good line on paper barely deposited any paint onto polymer clay.  I'm hoping that real squirrel hair brushes (which were used in the 18th cen for such a purpose) will improve things.


My final, and perhaps largest, concern is how to protect the surface.  Even when completely dry, one drop of water would lift the paint right up and and utterly ruin the miniature.  The clay slab is a bit too thick to put under glass with a frame (although that will probably be a possibility for the fake ivory I intend to try at some point soon), so I am trying to find a good spray varnish, intended for watercolor, which will seal the surface.  After all, it would be really pointless to have a miniature that you couldn't even risk taking outside!

Sunday, July 10, 2011

Sketches from UTR

If doing something twice constitutes the beginning of a habit, then I have effectively formed the habit of doing little sketches of friends and acquaintances at reenactments.

I had enormous amounts of fun with this at Under the Redcoat, and even though I'm shockingly late posting about it, I wanted to share my drawings from the event.  Like last time, they are all fairly small (so as to fit in my drawing box) and are roughly 5x7" each. 

Nicole
Nicole

Other-Sarah churning ice cream
Other-Sarah making ice cream

Sarah- 1st go 'round
Sarah
I like this little sketch, but utterly failed to capture her likeness.  This was highly irritating.  See below.

Sarah and Jenny
Sarah (again) and Jenny
As you can see, for a brief while I switched from charcoal to graphite pencil... I was incredibly frustrated by my lack of ability to capture Sarah's likeness when initially using charcoal.  The second drawing was even worse (really bad in fact, and I can assure you it will never be posted anywhere online!) so I gave the graphite a try.  On this third go, this time in graphite, it wasn't totally awful so I let it be.

I feel like an invisible challenge has been laid down though.  Sarah is such an animated and vivacious person that capturing her in a flat, still format felt somehow a little unnatural and far more difficult than I had anticipated.  I will have to try again when I next see her.  And maybe again and again...

Abby
Abby
Right before I was about to leave for the day, I saw Abby walking across Market Square, rushed up to speak with her, and she kindly agreed to sit for me.   As we sat there (she very still and I sketching quickly) a lot of people apparently came up to see what was going on.   This included the official CW photographer who even videoed us.  I was blithely unaware of most of our audience however... I hadn't even realized how much I block out my surroundings when I'm drawing!  If there'd been an attack, I'd probably have died first.

Conclusion- I'll definitely be doing this drawing schtick again at my next reenactment.  I love being able to engage peoples' interest in a slightly different way than normal, and I'd really like to start building up an impression around the idea of a traveling portraitist.  Lots of very vague ideas at the moment, but it could certainly become something.

Saturday, July 2, 2011

quarter back gown for UTR

Since I live in Williamsburg, it was kind of an imperative that I attend Under the Redcoat this year.  Not that I objected... I'd never really been to UTR before, and was really happy to be able to experience the event and see many wonderful friends and new acquaintances in the process!

And of course, I needed a new gown.


I used a medium weight linen from Burnley and Trowbridge that had small lavender, white and black stripes and lined the bodice and sleeves with a light-weight white linen.  My friend Nicole draped the pattern for the bodice and sleeves on me, and I cut everything out about a week before the event.  If I didn't work full-time, this would have been a perfectly fine time-frame in which to sew a gown, but as it was I nearly keeled over and died trying to get it done on time.  Even so, Nicole ended up almost entirely making my petticoat for me so that I could actually get a few hours of sleep the night before I was supposed to wear it.


The innards of the gown are pretty typical-


The seams of the back pieces are constructed with the "weird running whip stitch thingy" which is seen in a fair number of extant garments, and which Abby (Stay-ing Alive) thoroughly describes in a very helpful post.  As I tried it out, I fell utterly in love with this method of construction.  It's fast, easy, strong, and looks really neat and clean.  And, as you can see from the photo below, it looks totally normal on the outside.


I still want to add cuffs and trim to the sleeves, but I was pretty satisfied with how it all turned out.  It was fairly cool and comfortable to wear and I do kind of adore the fabric!

UTR itself was also highly satisfying, and I was able to take my little drawing box with me and do some sketches of people... but I'll save that for another post.

Monday, May 9, 2011

Miniatures: putting the brush to... clay


So.  Right.  Miniatures.

The research was easier than I thought it would be; mainly thanks to my access to the Rockefeller Library here at CW, which contains nearly every book published that pertains in any useful way to the eighteenth century.  The technical process on the other hand... well, that's a whole other kettle of fish.

I recently found a link to a vendor than sells all sort of materials for miniature painting, including several ivory substitutes.  While I fully intend to order and try a variety of these, I wanted to get painting (and practicing) at once and decided to experiment with polymer clay.


I rolled out the clay as smoothly as possible, and trimmed it to match the little frame that I have.  Since I wasn't sure which color would simulate ivory the most after baking, I made three different samples in: Ivory (natch), Winter Cream, and Translucent.  Oddly enough, Translucent came out a sort of clear, fleshy tone... way too pinky to be used for this sort of thing.  Winter Cream was a good color, but a bit too chalky in appearance.  Happily, the Ivory actually did look the most like ivory, and I set out to paint.

I started on a little shmushed piece that I'd baked as well, just to get a feel for the watercolor on this sort of surface.  Watercolor is persnickety at the best of times, but when you are applying it to a nearly totally non-absorbent surface it turns somewhat evil.  The most terrifying part which I found, is that even when the paint was dry, if you dripped water on it or added a wet wash, it lifted right back off again... just like it does on a palette.

This really hammered home to me why miniature painters nearly all employed a sort of stippled technique, as it is the least disturbing to paint already laid down.

For the very first miniature, I decided to simply copy an original, as I'm not attempting to do anything other than get a handle on the medium.  So far I've merely done a light outline and started to lay in the background.  We'll see how it progresses...

Sunday, April 3, 2011

New clothes! 18th Cen. Jacket in Pink

I shall preface this post with the disclaimer that the jacket is Not-Done-Yet and is still in want of trim.  That said, I've worn it twice now to two different gatherings, and wanted to document its existence.


The jacket is made of a pink cotton homespun, lined with a natural medium-weight linen.  This was one of those situations where I had both fabrics in my stash and really didn't want to spend extra money... Also, I'm trying very hard to move away from blue in my costuming, as about 2/3's of my historical wardrobe is in the blue family.  Not sure how successful I'll be in the long run, as I still adore blue (and it never fails to look good on me).

Like the majority of my historical clothes, the interior seams are all done by machine, but everything visible is hand-work.


The fullness of the skirts is achieved with five inverted box pleats, one at each seam, which are whipped to the lining for stability.

The pattern is very loosely based off the robe à l'anglaise in Jean Hunnisett's book.  I say "very loosely" as I looked at it for general sizing, and drew what I thought would work.  Fortunately, it did.  I didn't bother drafting a sleeve pattern though, and just adapted one of Nicole's personal sleeve bases.

I'll probably write more about research and general info once I really truly finish it, and can post pictures of it in all its trimmed glory.